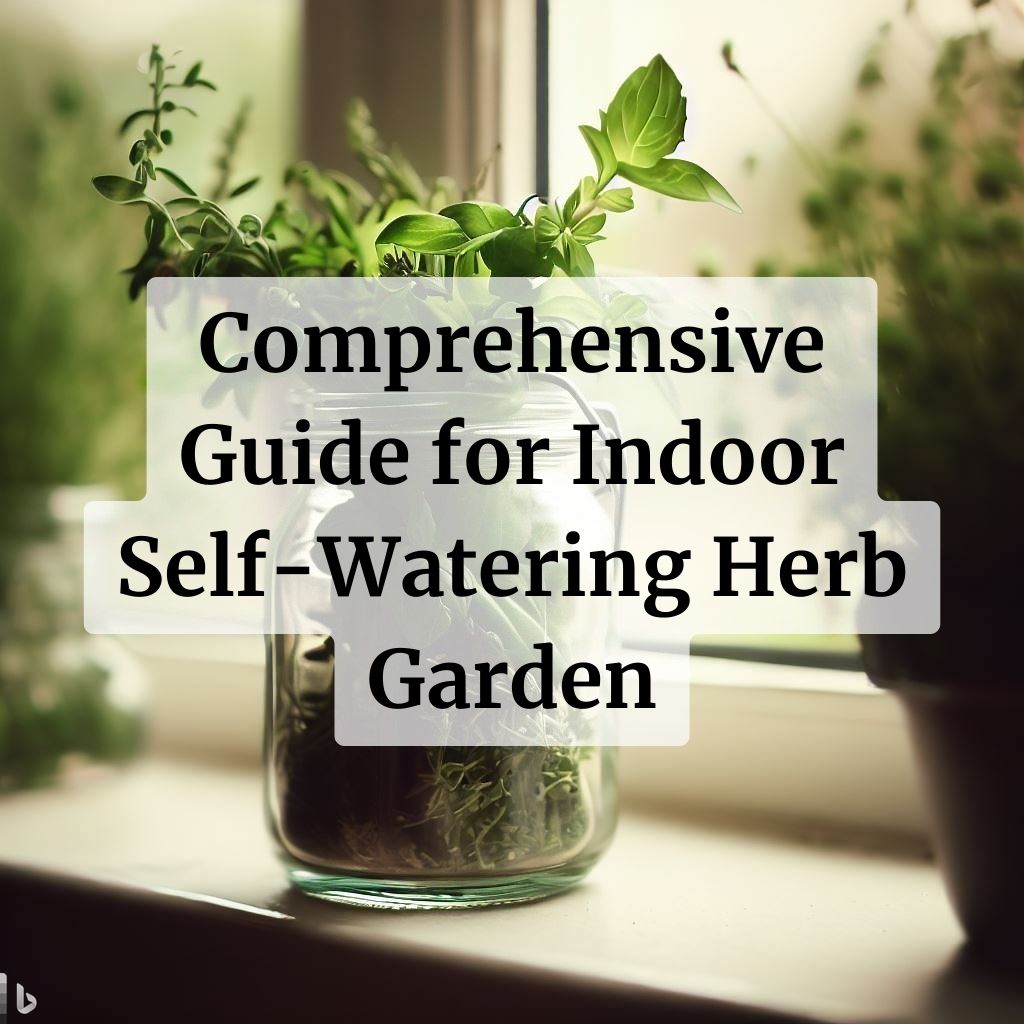
Looking to cultivate a thriving indoor self-watering herb garden? In this guide, we’ll cover everything you need to know about choosing the best herbs, containers, and maintaining your garden for a bountiful harvest.
In this article
- 0.1 What is an Indoor Self-Watering Herb Garden?
- 0.2 Benefits of Having an Indoor Self-Watering Herb Garden
- 1 I. Choosing the Right Herbs
- 2 II. Choosing the Right Containers
- 3 II. Setting Up Your Indoor Self-Watering Herb Garden
- 4 III. Step-by-step Instructions
- 5 IV. Planting Your Herbs
- 6 V. How to Prune Your Herbs
What is an Indoor Self-Watering Herb Garden?
Imagine having a mini oasis of fresh herbs flourishing right in your kitchen or living room. An indoor self-watering herb garden is exactly that. It’s a system that allows you to grow herbs in containers, providing them with a consistent and automated watering mechanism. Say goodbye to daily watering woes and hello to a thriving, aromatic herb garden.
Benefits of Having an Indoor Self-Watering Herb Garden
Having your own self-watering herb garden indoors comes with a bouquet of benefits. Here are just a few:
- Convenience: No need to worry about overwatering or underwatering your herbs; the self-watering system takes care of it.
- Freshness: Harvest herbs right from your kitchen for a burst of flavor in your dishes.
- Decorative: Herb gardens add a touch of natural beauty to your living space.
- Health: Herbs have various health benefits and can improve indoor air quality.
- Sustainability: Growing herbs at home reduces the need for store-bought, plastic-packaged herbs.
Now that you’re eager to embark on your indoor herb garden journey, let’s dive into the nitty-gritty details.
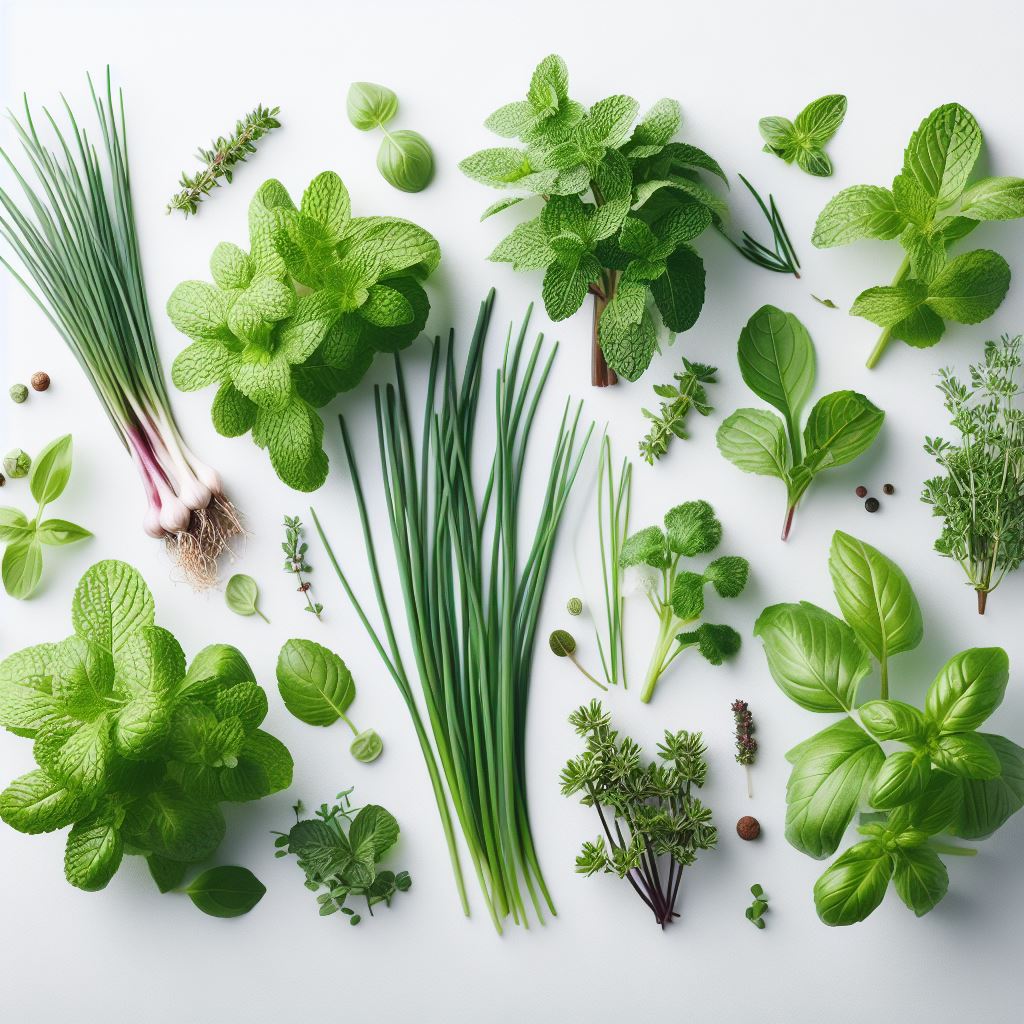
I. Choosing the Right Herbs
When it comes to selecting herbs for your indoor self-watering garden, not all herbs are created equal. Some thrive indoors, while others prefer the great outdoors.
Best Herbs for Indoor Self-Watering Herb Gardens
- Basil (Ocimum basilicum):
- A beloved staple in the culinary world, basil is a fragrant herb known for its versatility and delicious aroma. It’s a kitchen favorite, frequently featured in a wide range of dishes, including Italian, Thai, and Mediterranean cuisines. Basil thrives indoors with ample sunlight and warmth, making it an ideal candidate for your indoor self-watering herb garden. You can count on this herb to provide a steady supply of vibrant, aromatic leaves to elevate your cooking.
- Mint (Mentha spp):
- Mint varieties, such as peppermint and spearmint, flourish in indoor environments, offering not only fresh leaves for teas and recipes but also a delightful burst of invigorating fragrance. These herbs are known for their vigorous growth and are relatively easy to manage, even in indoor conditions. Whether you’re brewing a refreshing cup of mint tea or incorporating mint into your culinary creations, this herb is a refreshing and fragrant addition to your indoor garden.
- Chives (Allium schoenoprasum):
- Chives, known for their mild onion flavor and delicate, hollow leaves, are incredibly easy to grow and are excellent for garnishing dishes. They can be a chef’s secret weapon, adding a subtle oniony kick to salads, omelets, and a variety of other culinary creations. Chives are a valuable addition to your indoor self-watering herb garden, providing a touch of elegance and flavor to your kitchen.
- Thyme (Thymus vulgaris):
- Compact and low-maintenance, thyme is perfect for smaller containers and thrives well indoors. With its earthy, herbaceous flavor, thyme complements a wide range of savory dishes. It’s also a fragrant herb that can add an inviting aroma to your indoor garden. Whether you’re seasoning a roast or enhancing the flavor of soups and stews, thyme is a versatile herb that is well-suited to your indoor gardening endeavors.
- Parsley (Petroselinum crispum):
- Both flat-leaf and curly parsley varieties are suitable for indoor gardening, providing fresh greenery for your culinary creations. Parsley’s mild, grassy flavor makes it an excellent choice for garnishes, salads, and flavoring dishes. It’s a classic herb that can elevate the aesthetics and taste of your indoor garden while offering a generous supply of vibrant green leaves for your culinary adventures.
These carefully selected herbs encompass a spectrum of flavors and aromas, making them fantastic additions to your indoor self-watering herb garden. Whether you’re a culinary enthusiast or just looking to add some greenery to your living space, these herbs are sure to thrive and bring joy to your gardening experience.
Now that you’ve chosen your herbs, the next step is understanding how to care for them and ensure they flourish in your indoor garden. Let’s proceed to explore the crucial factors and techniques required for planting and nurturing your herbs after selecting them.
II. Choosing the Right Containers
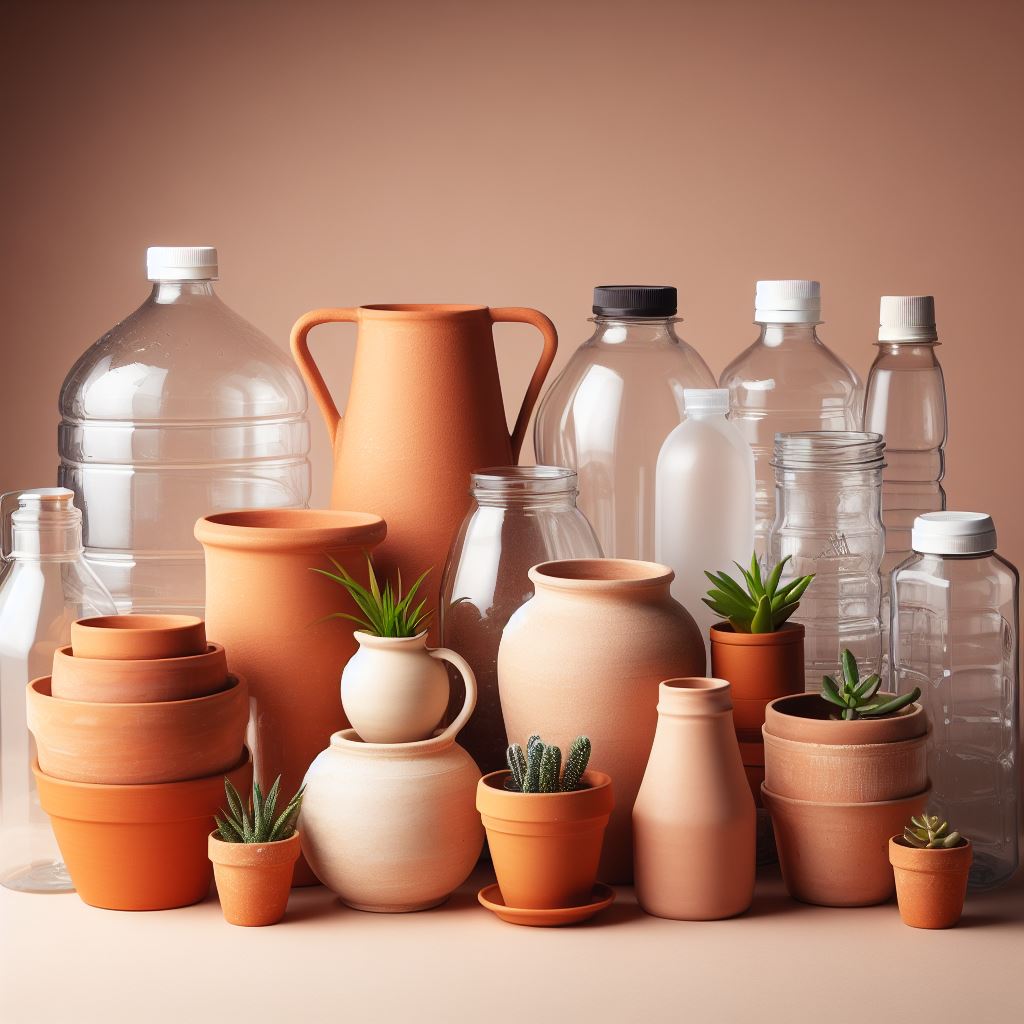
Selecting the right container for your indoor self-watering herb garden is a pivotal decision that can significantly impact your garden’s success. The container you choose not only plays a role in the aesthetic appeal of your indoor garden but also influences factors like moisture retention and root health. Here are several container options to consider:
Terracotta Pots:
Pros:
- Aesthetic Appeal: Terracotta pots have a classic and rustic charm, adding an earthy touch to your indoor herb garden.
- Breathable: Their porous nature allows better airflow to the roots, helping to prevent root rot.
- Affordable: Terracotta pots are often budget-friendly.
Cons:
- Frequent Watering: Their porousness also means that terracotta pots may require more frequent watering, as they tend to dry out faster. This could be a drawback if you’re looking for low-maintenance gardening.
Tip: To reduce the need for frequent watering, you can line the inside of terracotta pots with plastic or use a self-watering insert.
Plastic Containers:
Pros:
- Lightweight: Plastic pots are easy to move and rearrange, which is especially convenient if you want to optimize your herbs’ exposure to sunlight.
- Moisture-Retaining: Plastic containers tend to retain moisture well, which can be beneficial for your herbs.
- Affordable: They are often cost-effective and readily available in various sizes and styles.
Cons:
- Limited Aesthetic Appeal: While practical, plastic containers may not have the same visual appeal as other options. However, you can enhance their appearance with decorative outer pots or creative painting.
Tip: Opt for plastic containers with drainage holes to prevent overwatering, and consider using saucers to catch excess water.
Ceramic and Decorative Containers:
Pros:
- Aesthetic Variety: Ceramic and decorative containers come in an array of styles, colors, and shapes, allowing you to select one that complements your home decor and personal taste.
- Durability: Many ceramic pots are sturdy and built to last, making them a worthwhile investment.
- Moisture Retention: Like plastic, ceramic containers can help maintain the soil’s moisture levels.
Cons:
- Weight: Ceramic pots can be heavy, making them less suitable for frequent relocation.
- Cost: Higher-quality ceramic and decorative containers can be pricier than other options.
Tip: When using ceramic containers, ensure they have drainage holes to prevent waterlogged soil. Additionally, consider using a saucer or a plastic pot with drainage inside to protect your decorative pot.
Creative Alternatives:
Besides the standard options mentioned above, you can explore creative and unconventional containers to add a unique touch to your indoor herb garden. Ideas include:
- Wooden Crates: These can give your garden a rustic and charming look. Line them with plastic to protect the wood.
- Hanging Containers: Suspended planters, such as macramé hangers, can save space and add a whimsical touch to your indoor garden.
- Repurposed Items: Old teacups, mason jars, or wooden boxes can be repurposed into charming herb containers, adding a personalized and eco-friendly aspect to your garden.
By carefully selecting the right container for your herbs, you can enhance the aesthetics of your indoor self-watering herb garden while creating a favorable environment for your herbs to thrive. With your chosen herbs and containers in mind, you’re now well-prepared to move on to the next crucial step in this gardening journey: setting up your indoor self-watering herb garden.
II. Setting Up Your Indoor Self-Watering Herb Garden
Choosing the Right Location
Selecting the perfect location for your indoor herb garden is a pivotal step in ensuring the success and vitality of your herbs. The position of your garden within your home can significantly influence the health and growth of your plants. Here are the key factors to consider when choosing the right spot:
Light:
Light is one of the most critical factors in the growth of your herbs. Most herbs require a minimum of 6-8 hours of sunlight each day to thrive. Here are some essential considerations:
- Sunlight Exposure: Herbs are sun worshippers, and they will appreciate being placed in a location that receives direct sunlight. A south-facing window is often an excellent choice for providing ample natural light.
- Artificial Grow Lights: If your indoor space lacks access to direct sunlight, don’t despair. You can supplement natural light with artificial grow lights. These specialized lights mimic the full spectrum of sunlight, ensuring your herbs receive the light they need to photosynthesize and grow vigorously.
Temperature:
Maintaining a consistent temperature within your indoor herb garden is crucial for the well-being of your plants. Most herbs prefer temperatures within the range of 60-70°F (15-24°C). Here’s why temperature control is essential:
- Stress Prevention: Sudden temperature fluctuations can stress your herbs. It’s best to avoid placing your herbs in areas with extreme temperature changes, such as near heating or cooling vents.
- Consistency: Try to maintain a steady indoor temperature to provide a stable and comfortable environment for your herbs to thrive.
- Adaptation: Different herbs may have slightly varying temperature preferences, so consider the needs of each herb when selecting their positions within your garden.
Air Circulation:
Adequate air circulation is a secret ingredient for preventing mold and mildew in your herb garden. Proper airflow helps maintain a healthy, disease-free environment for your herbs. To achieve this, remember the following:
- Avoid Overcrowding: Crowding your herbs too closely together can hinder air circulation, leading to potential problems. Allow sufficient space between plants to ensure air can move freely around them.
- Ventilation: If your indoor space lacks natural ventilation, consider using fans to ensure that air circulates well around your plants. Oscillating fans or ceiling fans on low settings can help create the desired airflow.
By carefully assessing the light, temperature, and air circulation in your chosen location, you can create an ideal environment for your indoor herb garden to flourish. Remember that each herb may have specific preferences, so it’s essential to understand the individual requirements of your chosen herbs as you arrange them in your indoor garden. With the right setting, your herbs are on their way to thriving in their new home.
III. Step-by-step Instructions
Setting up this system is a straightforward process, and here’s a step-by-step guide to make it easy for you:
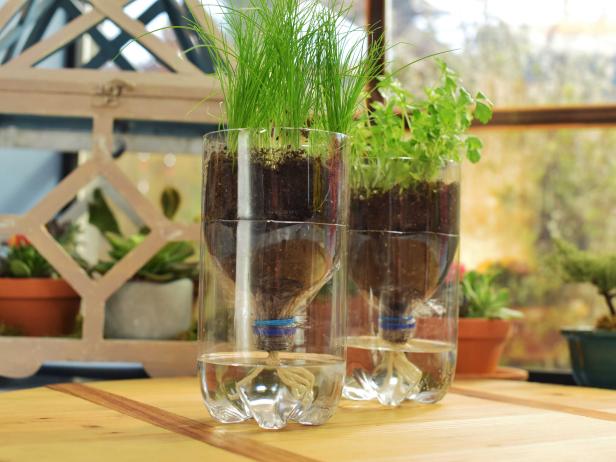
Step 1: Select a Self-Watering Container
You have two options here: you can either purchase a ready-made self-watering container from a garden supply store, or you can create your own. Here’s how to make your own self-watering container:
- Materials You’ll Need:
- A plastic container with drainage holes (inner pot).
- A decorative outer pot.
- Choose a decorative outer pot that complements your indoor decor and is large enough to accommodate the inner plastic container comfortably.
- Place the inner plastic container with drainage holes inside the decorative outer pot. Ensure there’s some space between the bottom of the inner pot and the outer pot.
Step 2: Add a Wicking Medium
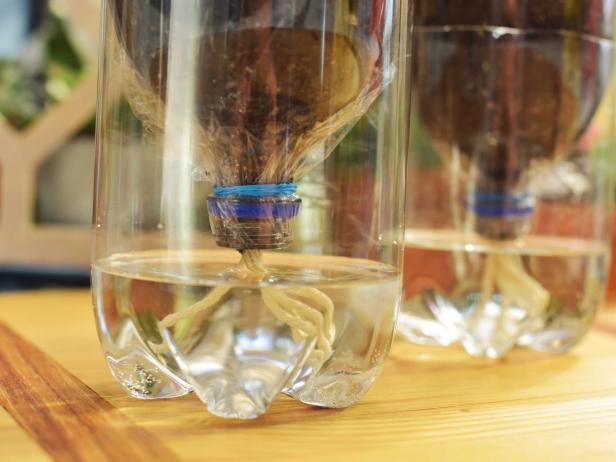
The wicking medium is a crucial element in your self-watering system, as it helps draw water from the reservoir to the plant’s roots. Perlite or vermiculite are excellent choices for this purpose.
- How to Add the Wicking Medium:
- Fill the bottom of the inner plastic container (your self-watering pot) with a layer of perlite or vermiculite. This layer should be approximately 1-2 inches deep, depending on the container’s size.
- Spread the wicking medium evenly across the bottom, ensuring that it covers the entire surface.
Step 3: Set Up the Water Reservoir
The water reservoir is where your herbs will draw moisture from, ensuring they have a constant supply of water. You can use a saucer or even a water bottle with holes as a reservoir.
- How to Set Up the Water Reservoir:
- Place the saucer or water bottle with holes at the base of the decorative outer pot. Make sure it fits snugly and securely.
- The water reservoir should sit directly underneath the inner plastic container, which is filled with the wicking medium. This arrangement allows the wicking medium to draw water up to your herbs’ roots.
Step 4: Plant Your Herbs
Now that your self-watering container is ready, it’s time to plant your selected herbs.
- How to Plant Your Herbs:
- Fill the inner plastic container with a high-quality potting mix, leaving enough space at the top for your herbs.
- Plant your selected herbs in the potting mix, ensuring they’re at the appropriate depth and properly spaced from each other. Consider the individual spacing requirements of each herb.
- Make sure that the wicking medium at the bottom of the container makes direct contact with the soil, enabling it to draw water efficiently.
Step 5: Fill the Reservoir
Your self-watering system is almost ready to go. The last step is to add water to the reservoir.
- How to Fill the Reservoir:
- Pour water into the saucer or water bottle reservoir at the base of the outer pot. Fill it until the water level reaches the bottom of the inner plastic container.
- Keep an eye on the water level in the reservoir. Monitor it regularly to ensure it doesn’t dry out completely. Refill the reservoir as needed to maintain a steady supply of moisture for your herbs.
By following these simple steps, you’ve established an effective self-watering system for your indoor herb garden. This system will provide your herbs with the hydration they require, making your gardening experience more convenient and successful.
How to Prepare Your Soil
Herbs thrive in well-draining soil. To prepare the soil:
- Choose the right potting mix: Opt for a high-quality potting mix with good drainage.
- Add organic matter: Mix in compost or well-rotted manure to enrich the soil with nutrients.
- Test pH levels: Herbs generally prefer a slightly acidic to neutral pH, so check and adjust as needed.
With your self-watering system and soil in place, it’s time to plant your herbs and watch them flourish. In the next part, we’ll delve into the art of planting and caring for your herbs in your indoor garden.
IV. Planting Your Herbs
With your self-watering system in place and your choice of herbs and containers finalized, it’s time to embark on the exciting journey of planting your herbs. This step sets the foundation for your indoor herb garden’s success.
How to Plant Your Herbs
Follow these straightforward steps to ensure your herbs get off to a healthy start:
- Prepare the Soil: Begin by filling your chosen container with a high-quality potting mix. Ensure the soil reaches within an inch or so of the container’s rim. You can mix in a small amount of slow-release fertilizer if your potting mix doesn’t already contain nutrients.
- Select Your Herbs: Decide on the placement of your herbs within the container. Consider the growth habits and height of each herb, placing taller herbs towards the center or back and shorter ones towards the edges.
- Remove the Herbs from Their Pots: Gently remove the herbs from their nursery pots by pressing on the sides of the pot while holding the plant’s base. Be careful not to damage the roots.
- Plant Your Herbs: Dig small holes in the soil, creating pockets where you’ll place each herb. Ensure the herbs are at the same depth as they were in their original pots, and space them according to their specific requirements.
- Water Thoroughly: After planting, water your herbs generously to help them settle into their new home. Ensure that the soil is evenly moist but not waterlogged.
How to Care for Your Herbs After Planting
Once your herbs are in their new containers, proper care is crucial for their health and vitality:
- Watering: Check the moisture levels in the soil regularly. Your self-watering system will handle the bulk of the watering, but it’s still important to ensure that the soil remains consistently moist.
- Fertilization: Herbs benefit from occasional feeding. Use a balanced, water-soluble fertilizer, and apply it according to the package instructions. Avoid over-fertilizing, which can negatively impact the flavor of your herbs.
- Pruning: Regularly trim or pinch back your herbs to encourage bushier growth and prevent them from becoming leggy. We’ll delve into pruning in more detail shortly.
V. How to Prune Your Herbs
Pruning is a vital aspect of herb care, promoting healthy growth and ensuring your herbs remain vigorous and productive. Here’s a guide to help you prune your indoor herbs effectively:
- Timing: Begin pruning when your herbs have grown to a reasonable size. You’ll want to wait until they have developed a substantial amount of foliage.
- Tools: Use clean, sharp scissors or pruning shears to make precise cuts. This helps prevent unnecessary stress to your herbs.
- Types of Pruning:
- Top Pruning: Regularly pinch off the tips of your herbs’ stems to encourage branching and bushier growth. This also delays flowering in some herbs, keeping them productive longer.
- Leaf Pruning: Trim individual leaves as needed for your recipes, ensuring you don’t remove more than a third of the plant’s foliage at once.
- Remove Dead Growth: Eliminate yellowing or dead leaves and stems to maintain the plant’s health and appearance.
- Frequency: Continual, light pruning is more effective than infrequent, heavy pruning. Prune your herbs as needed, ensuring you remove only a small portion of growth each time.
Proper pruning not only helps you maintain healthy and attractive herbs but also provides you with a steady supply of fresh, flavorful leaves for your culinary creations.
With your herbs now planted, cared for, and pruned effectively, your indoor self-watering herb garden is well on its way to thriving. In the next part of our guide, we’ll explore how to maintain your garden, ensuring your herbs receive the proper care they need to flourish.
Frequently Asked Questions
How often should I water my herbs in a self-watering system?
In a self-watering system, you’ll primarily rely on the reservoir for moisture. Check the water level in the reservoir regularly, and refill it when it’s low. Generally, you won’t need to water the soil directly as the wicking medium and the self-watering system handle the hydration.
Do I need to use fertilizers for my indoor herbs?
Yes, providing your herbs with proper nutrients is essential for their health and growth. Use a balanced, water-soluble fertilizer and follow the package instructions. Apply fertilizer every 2-4 weeks during the growing season (spring and summer) and reduce or stop in the dormant season (fall and winter).
Can I grow multiple herbs in a single container?
It’s possible to plant multiple herbs in a single container, but consider the growth habits, light requirements, and spacing recommendations for each herb. Herbs that have similar care requirements are more suitable for sharing a container.
Should you have more queries or encounter unique situations, don’t hesitate to reach out for assistance, and remember that herb gardening is a learning experience that can be highly rewarding.
Happy gardening!
Reference:
Growing Indoor Plants with Success, University of Georgia.
Make It! Self Watering Herb Garden